

Armed with our plans we commenced building our packs in late September or early October, with a Halloween deadline. Our goal was to win cash at costume contests.
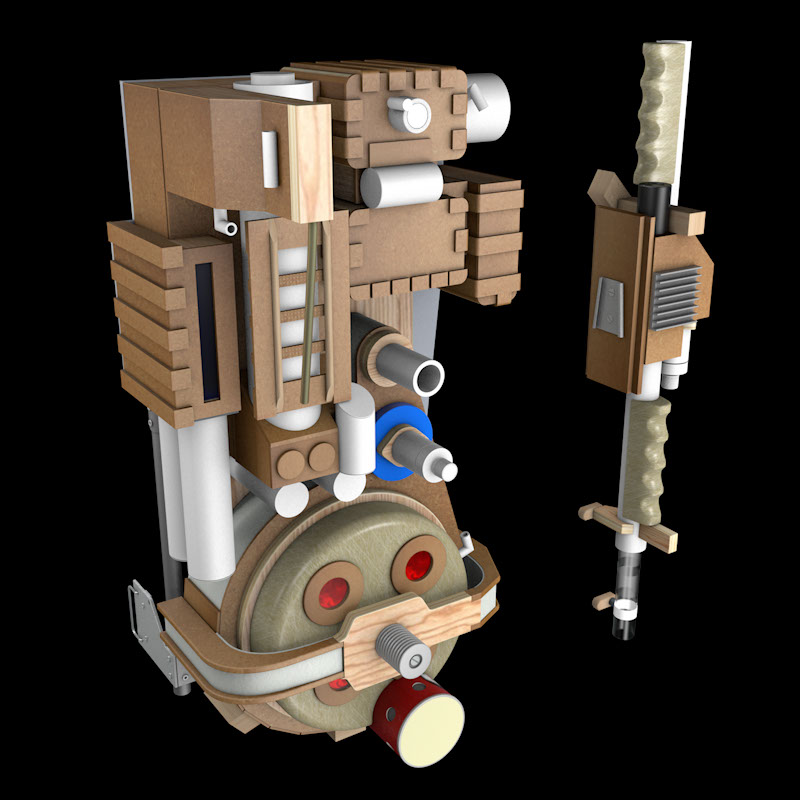
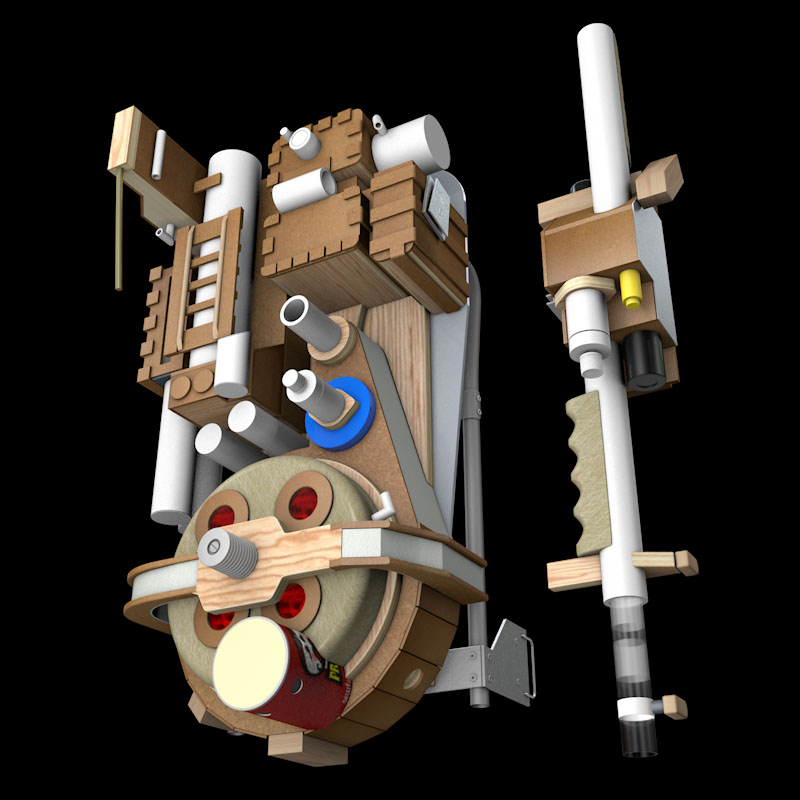
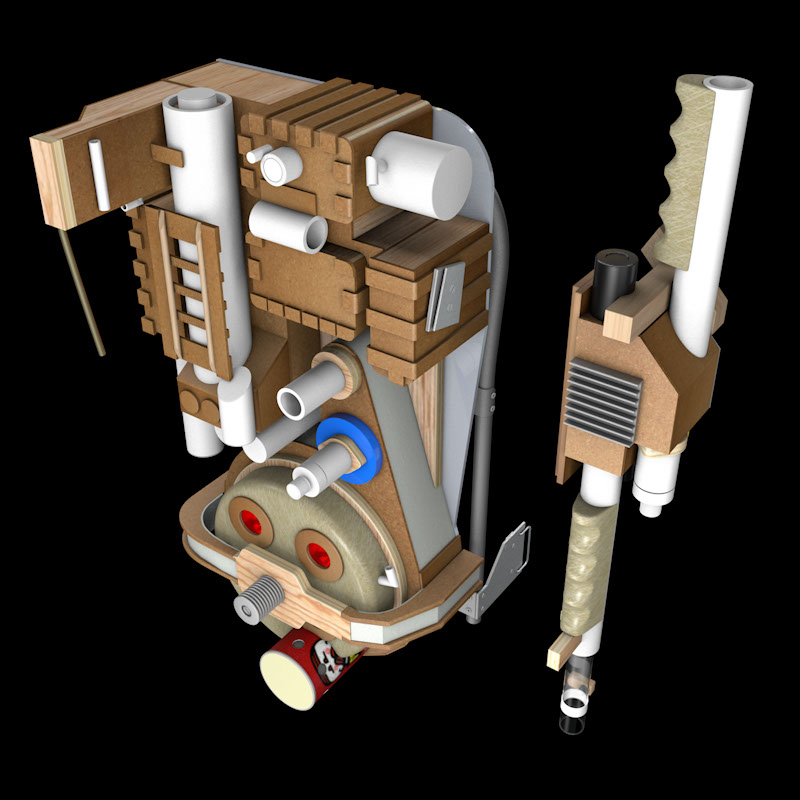
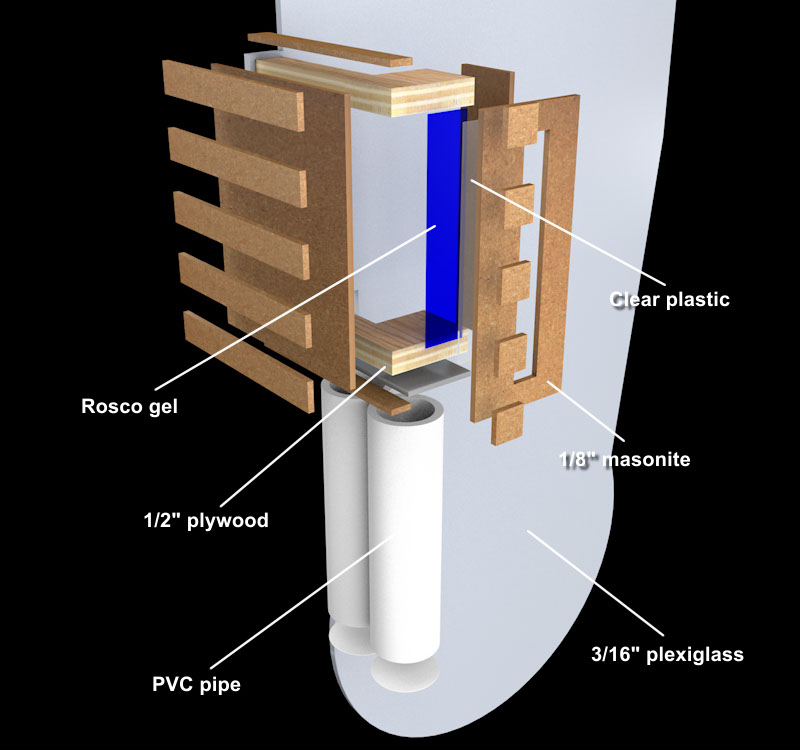
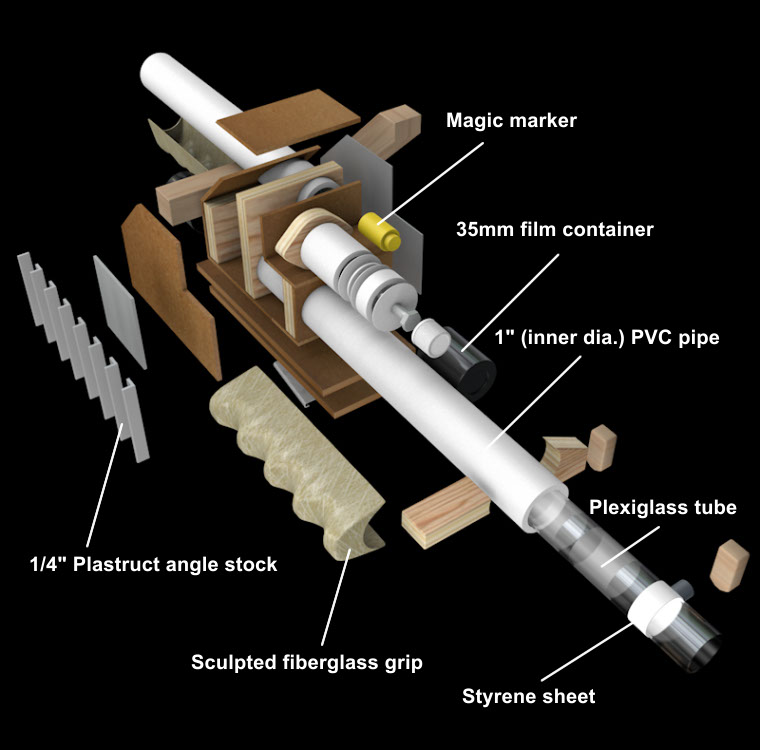
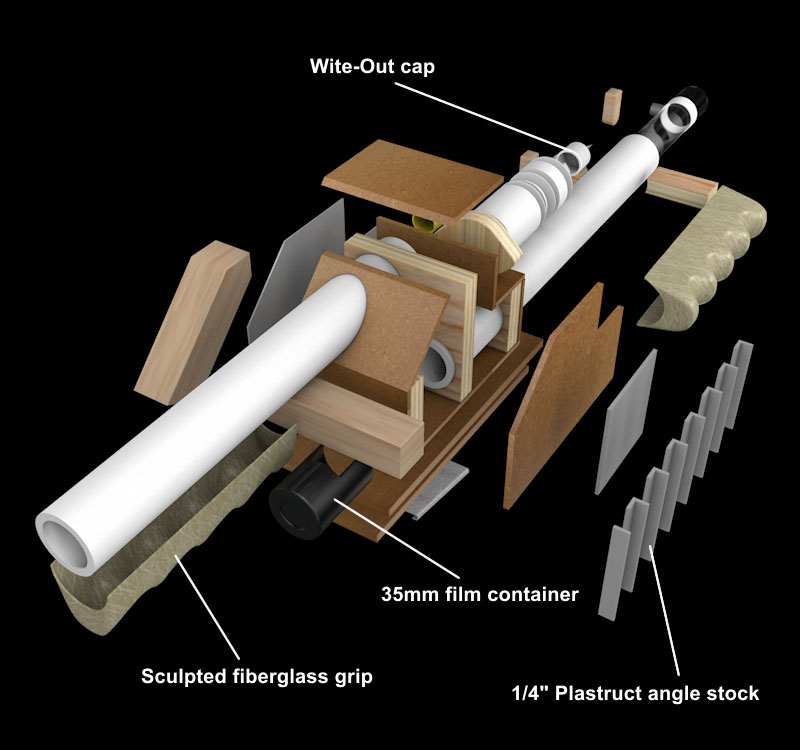
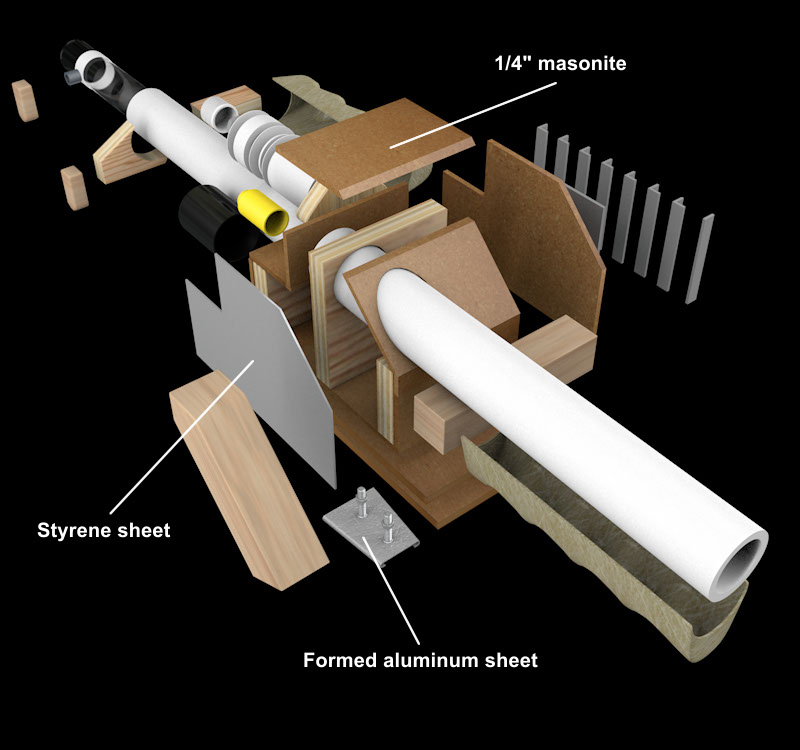
With our focus being on the end result rather than the process it didn't occur to us to take any pictures of our build in-progress. Taking photos in 1984 meant buying film and having it developed. That was $5-$7 we didn't want to spend at the time. So in lieu of photos I've built and rendered this 3D model in Cinema 4D to show what went into our packs.
This 3D model is a close representation showing the main elements we fabricated from scratch to build these packs. Some of our details are wrong, mainly due to the fact that we were limited by our camera angles, and some of the proportions are a bit off here and there.
We used 1/2 inch plywood for most of the structure, covered with 1/8 inch masonite. The biggest advantages of using these materials was that they were sturdy, they were easy to cut and sand, and they were really cheap. Of course the biggest disadvantage was that the finished packs weighed a ton.
The wood parts were cut in my dad's garage workshop. We used a variety of PVC pipe for the cylindrical parts.
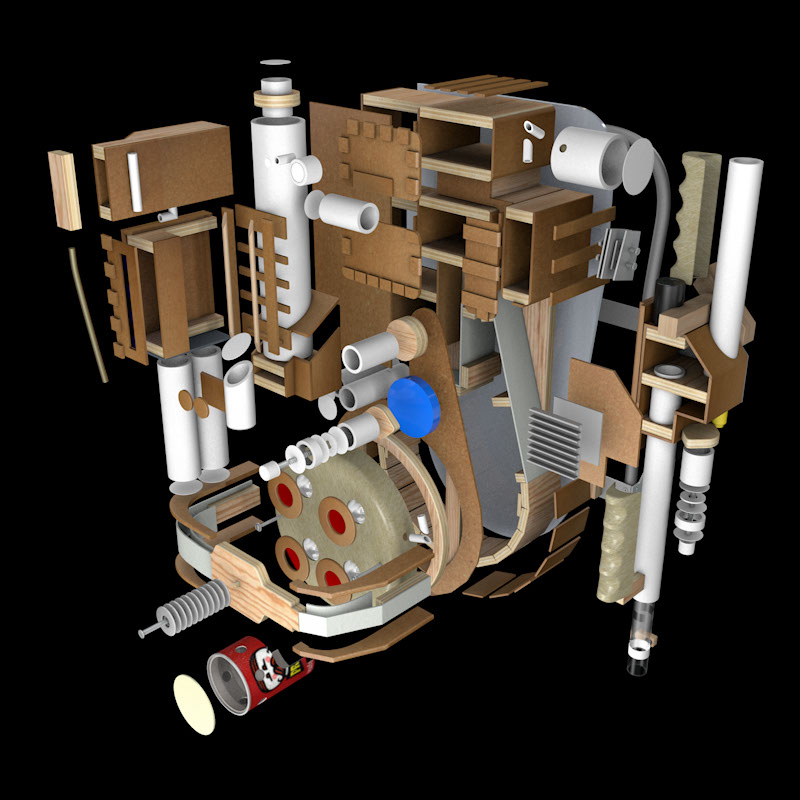
This exploded view shows the underlying plywood structures and the assembly of many of the elements.
Our goal was to build accurate replicas as reasonably cheaply as we could. My recollection is that we built both of our packs for around $50-$75 total, plus maybe $25 each for green surplus flight suits.
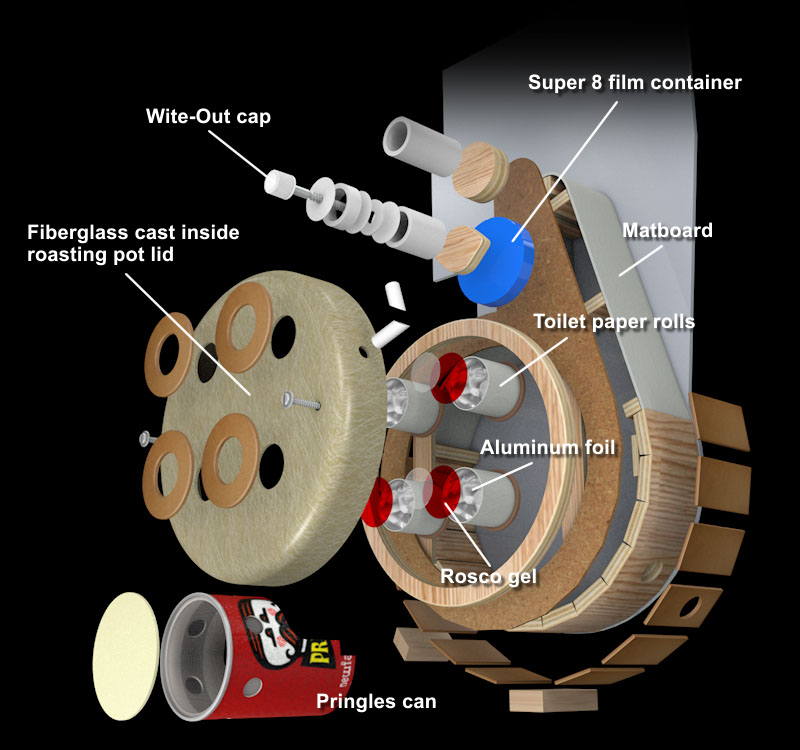
Synchronous Generator, Cyclotron and N-Filter Assemblies - We glued 1/2 inch plywood blocks to the masonite cover piece around the lower half of the assembly to form that structure, covered with 1/8 inch masonite plates. Additional plywood blocks served as support for matboard wrapped around the upper half.
Using copious amounts of wax and mold release I cast the Cyclotron inside a roasting pan lid I had that was pretty close to the size we needed. The proportions are just a little off.
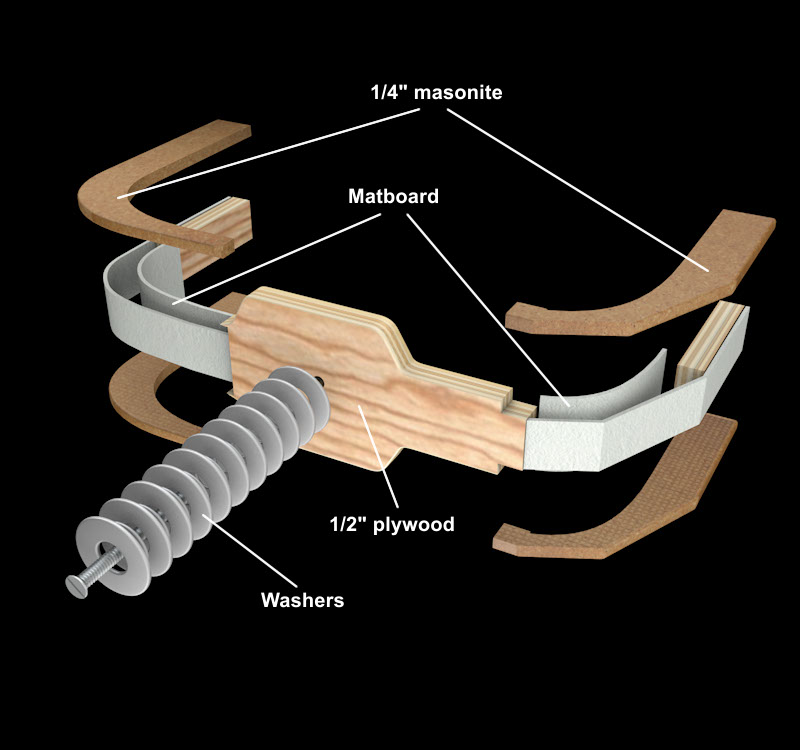
Bumper and Shock Mount - The bumper is a combination of masonite, plywood and matboard glued together. The Shock Mount is 21 washers (two sizes) glued together with JB Weld and bolted to the plywood.
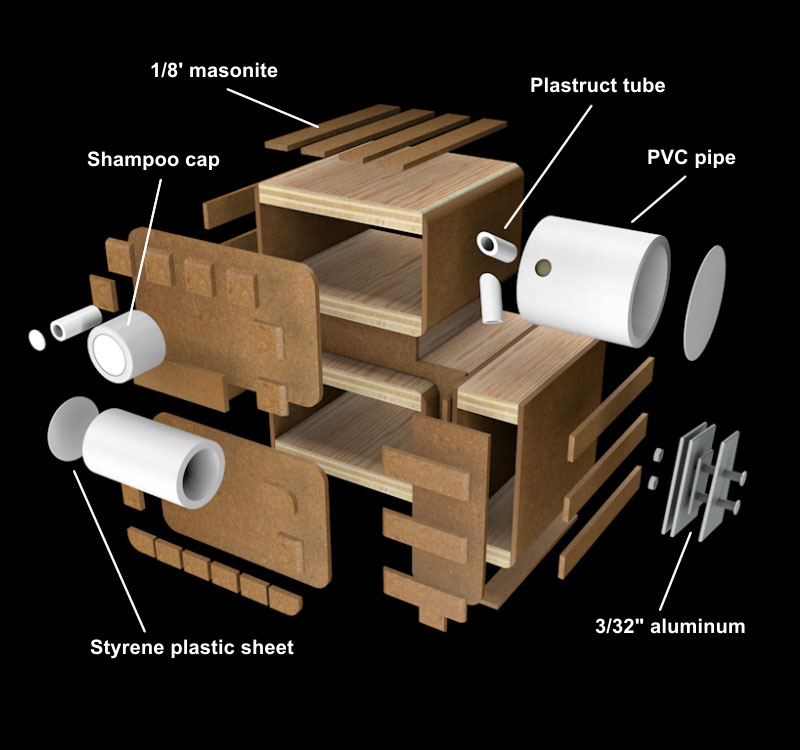
Crank Generator and HGA - More plywood, masonite, PVC, sheet plastic and a shampoo cap. So, so heavy.
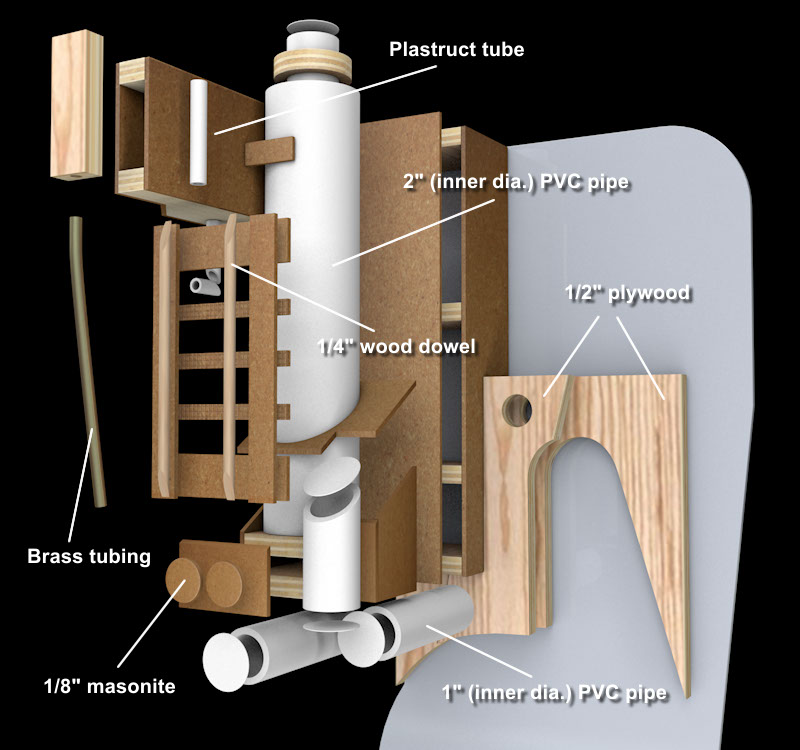
Booster and Ion Arm - We bent the brass tube to match our photos. I assume that got bent in transit at some point. I kind of liked that look, but recently corrected the bend.
Power Cell and Injectors - Plywood, masonite, and PVC. Rosco gel is used for studio lighting; I appropriated these blue and the other red bits from KOLD-TV, where I was working at the time.
Proton Gun - The basic structure consisted of plywood, masonite and PVC pipe with odds and ends added on for the major details.
Bryan sculpted a handgrip from plasticine clay. I made a fiberglass mold of that and then cast four fiberglass positives. This worked okay since there were no undercuts. I had no knowledge at the time of casting rubbers, and that would have been too expensive anyway.
Proton Gun - The heatsink has the wrong number of fins, but we didn't want to take the time to modify the stock Plastruct angle pieces. We couldn't tell from our photos that the top left edge of the main housing was supposed to be curved along the shape of the back handle.
For those who don't know, back when we used typewriters you might use Wite-Out correction fluid to paint over typos. You'd brush this white paint over the typo, wait for it to dry, and then type over that.
Proton Gun - Due to the configuration of the prop when we took our photos the left side of the gun remained a mystery to us. We stuck a few knobs on that side which worked well enough.
Bryan formed the gun bracket from sheet aluminum.
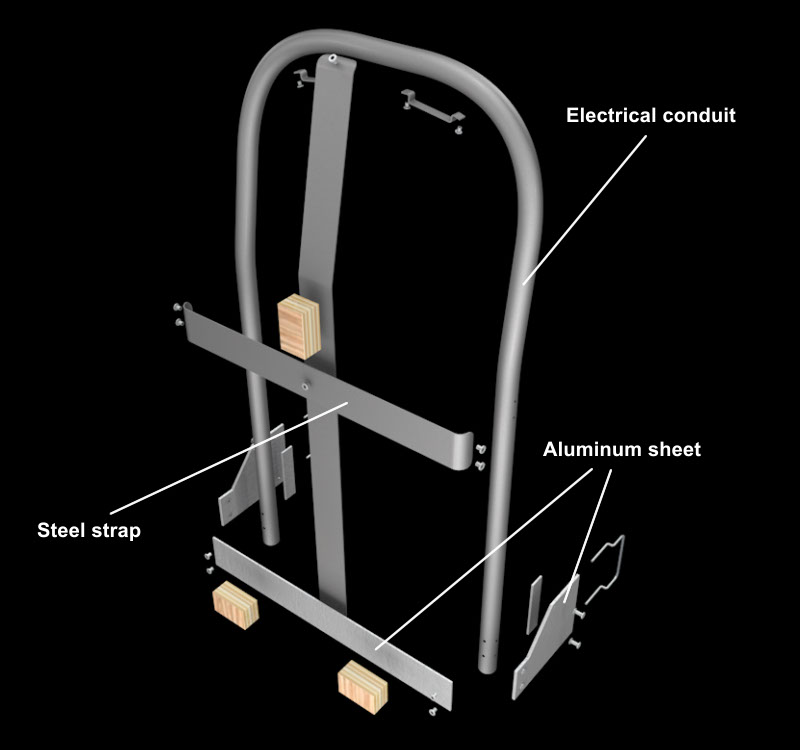
Pack Frame - We couldn't find (or didn't want to buy) authentic Alice Pack frames, so Bryan fabricated ours from scratch using a conduit bender and rivet gun.
We acquired surplus straps that we were able to adapt to this design.
<
>

Site and Photos ©2014 Shawn Marshall and Bryan Ambacher


