

November 10, 1984 - The culmination of our efforts. As far as I know these are the first images of our (mostly) completed packs, shot by a KOLD-TV videographer at the Tus-Con XI masquerade contest. The raw video of this and the newscast excerpt can be found in the Video section of this site.
I think this was the second time we wore these in public. The first was at a Halloween costume contest at a bar/restaurant called Smugglers' Inn. I think we won $100.
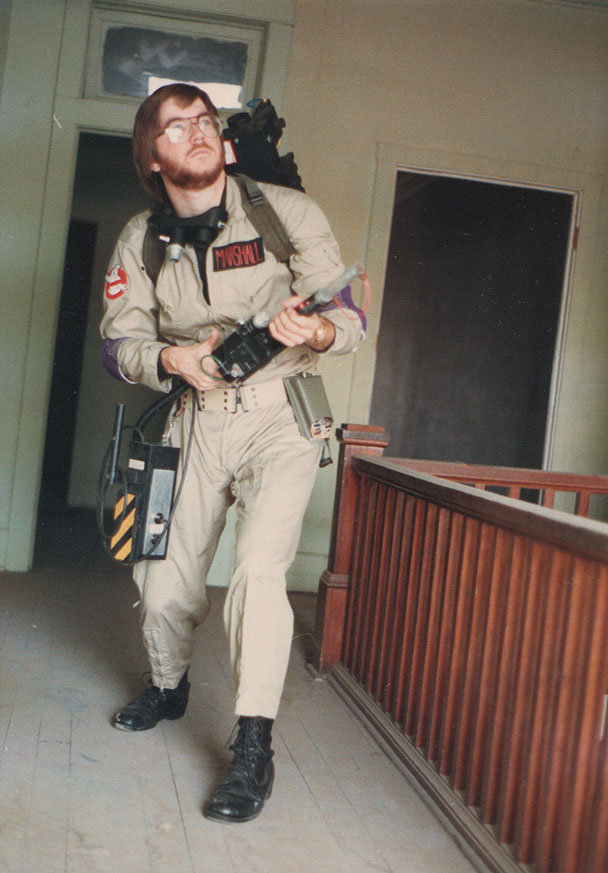
1985 - Our completed packs and some accessories, taken on the deserted second floor of some building in Phoenix. Bryan's pack is on the left, mine is on the right. We stippled fiberglass resin over the wood and cardboard to create a rough, cast-iron sort of texture that seemed evident in our reference photos. We spray painted the packs semi-flat black, then brushed on silver highlights to emulate weathered metal.
The belt thingee came from a surplus store, the Ecto-Goggles built very quickly and cheaply from safety goggles.
My pack. We had no affordable way to print our own stickers (the first Mac computer went on sale in early 1984), so we pulled stickers off the backs of arcade video games, copy machines, electrical boxes, weed-whackers, etc. Whatever was in the ballpark in regards to size and color.
We used hot glue dry-brushed with silver model paint to emulate the welds.
At some point in 1985 we tracked down imitation khaki flight suits from a surplus place in California. Cheap being the operative word the elbow pads were cheap kneepads. The patch was made from felt with painted details. Bryan's mom sewed our name patches.
On the hunt in Phoenix. You can see the faux Alice pack frame that Bryan built from scratch.
A very dusty location.
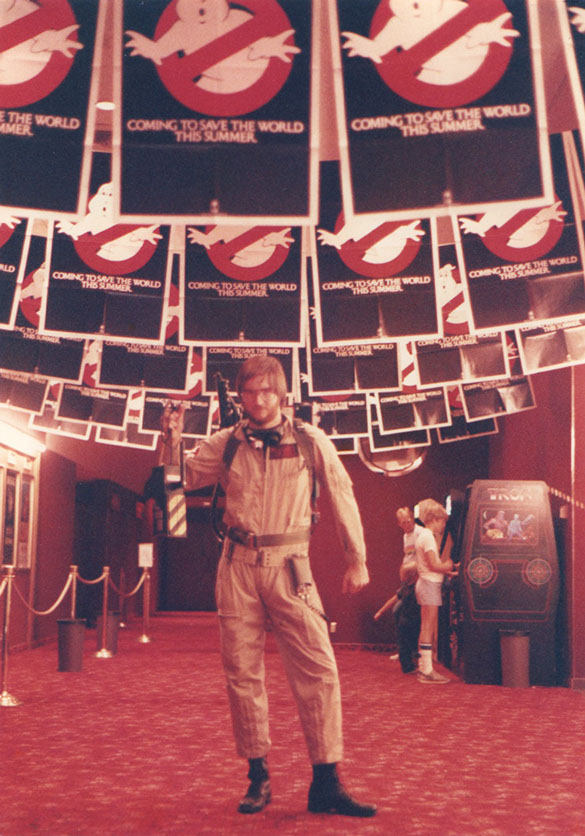
Summer 1985 at the Foothills Mall Cinemas for the re-release of Ghostbusters.
I got a stack of these 1984 teaser posters for our appearance at the theater. Also, Tron!
1986? - After several years of lugging around this ludicrously heavy prop I decided to replace almost all of the plywood, masonite and cardboard parts with fiberglass. I disassembled the major components and made plaster molds of them. This was, of course, a horrible approach, but it's all I could afford. I laid up fiberglass into these well-waxed molds, and ended up having to break apart most of the molds to extract the fiberglass shells. The resulting pieces are more irregular and dinged up than the original wood parts, but a fair amount lighter. It's still pretty heavy, though, weighing in at around 17 pounds now (without batteries).
The gun here is still the plywood and masonite original.
The LED readout on the gun is just a piece of reflective rainbow sticker. By 1985 I had built the circuit for the red cyclotron lights (with the help of some TV-station engineers and Forrest Mims' book). I'd later build a poor-man's version of the blue power cell lights. I didn't have enough battery oomph to drive ten incandescent bulbs at once, so I created an oscillating version that ping-ponged a single light like a Cylon.
A good view of the bumper, scratch-built Clippard, plastic super 8 can and fiberglass roasting pan lid Cyclotron.
Crank Generator featuring crank made of a shampoo bottle cap and plastruct and sticker peeled from the back of an Atari arcade video game. The mounting plate on the gun is still lacking detail which we didn't correct until I got some decent reference photos at a Planet Hollywood (around 1990 I think.)
2001 - My pack as it pretty much exists now.
The single oscillating Power Cell light is visible here. Now that blue LEDs are affordable it would probably be a somewhat simple matter to create a more accurate version of this.
At some point I acquired the correct crank, which I've connected to a potentiometer that controls the speed of the blue oscillating lights.
Cyclotron and such showing the rough texture created by the stippled fiberglass resin.
At some point I upgraded the gun by casting it in fiberglass into which I installed additional electronics. I built the thumbswitch box out of styrene sheet plastic.
I never got around to adding some hot glue painted silver to simulate the welding around the back handle. The knobs are plastic surplus bits. Not entirely accurate, but they get the job done.
The yellow LED bar graph is driven by a circuit from one of the Forest Mims books.
This shot clearly shows the Alice pack that Bryan fabricated. You can also see the U-shaped shelving rails I added to the back to strengthen the plexiglass motherboard.
The inside of my Cyclotron showing the laid up fiberglass, toilet-paper tubes, Pringles can, circuit and wiring.
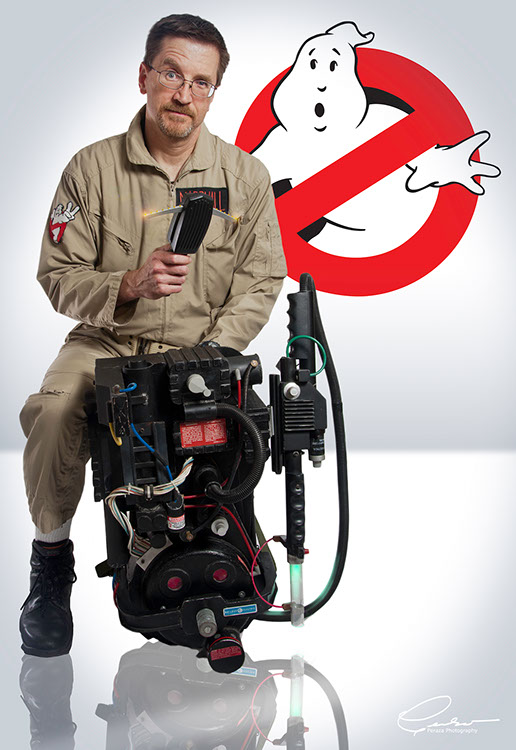
Here's how I look today in a photo taken by my good friend Pedro Peraza in 2011 at his Halloween party and composited by my other good friend Chris DeLorenzo. I'd pulled an all-nighter to get my 1989 scratch-built PKE meter working again. We switched to Ghostbusters 2 patches for the 1989 release of the sequel. My imitation flight suit is a little tight and short for me. I no longer wear the real (and painful) surplus combat boots we originally wore, nor the elbow pads. Bryan fabricated new belt thingees out of leather (not seen here).
2014 - Bryan's pack as it exists now. His pack is still built out of the original plywood and masonite and retains generally sharper edges in the major components. He added some details I never bothered to add.
Bryan's gun, lacking electronics but featuring part of a real Clippard.
The rough texture from the fiberglass resin stippling is evident here. We might have overdone it a bit.
At some point in the late 80's or early 90's Bryan bought a real Alice pack frame for his Proton Pack.
Bryan's pack, opened up, revealing a bit of the plywood blocking used to support the matboard making up the upper part of the Synchronous Generator. He added a camera flash to the tip of his gun.
2014 - My quickly-built trap, comprised mostly of masonite and some plywood, decorated with various surplus knobs and junk. It was never meant to be closely scrutinized.
The innards of my trap. Winning costume contests takes more than technical accuracy; you need a gimmick, and this smoking trap was one of ours. The containers came from our fiberglass supplier. The bottom would hold dry ice; the top container would hold warm water. Right before going out on stage I'd open the small water valve visible on the right to let warm water flow in over the dry ice, creating copious amounts of smoke for a few minutes.
The other side of our trap. The water valve that lets the warm water over the dry ice is visible.
<
>

Site and Photos ©2014 Shawn Marshall and Bryan Ambacher


